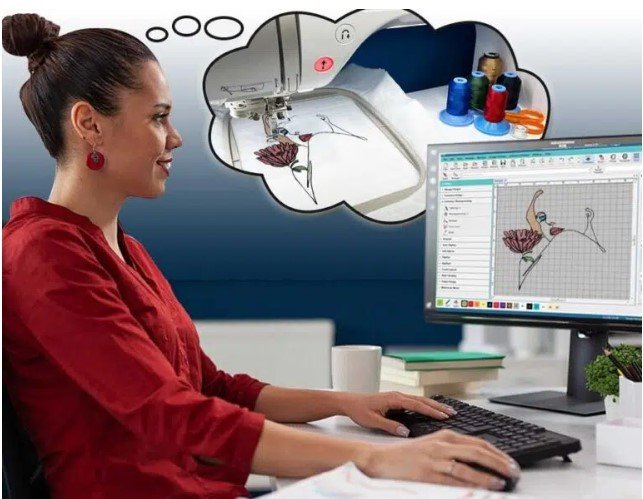
So, you’ve got a logo and you want to stitch it onto hats, shirts, or tote bags? That’s awesome! But before your embroidery machine can bring that logo to life, you’ll need to digitize it, that is, convert it into a stitch-ready file format your machine understands.
The good news? You don’t need to be a tech wizard or pro designer to get this done. In this step-by-step guide, we’ll walk you through the simple process of digitize logo for embroidery and you’ll be ready to go in no time.
Want to skip the technical stuff? Use Digitizing Buddy for fast, affordable logo digitizing. Just upload your logo and get a perfect embroidery file—PES, DST, JEF, and more—delivered to your inbox. Fast turnaround, pro quality, and no headaches.
What Does It Mean to Digitize a Logo?
Digitizing a logo means converting a standard image file (like JPG, PNG, or SVG) into a machine-readable embroidery file. This file tells your embroidery machine exactly:
- Where to place stitches
- What type of stitches to use (satin, fill, run)
- How thick each stitch should be
- What color threads to use
- When to change threads or stop stitching
You can’t just drag and drop a regular image into your machine. It won’t know what to do with it until it’s properly digitized.
What File Formats Do Embroidery Machines Use?
Each embroidery machine brand uses different file formats. Here are some of the most common:
| Machine Brand | File Format |
| Brother/Babylock | PES |
| Janome | JEF |
| Bernina | EXP |
| Husqvarna/Pfaff | VP3 |
| Tajima | DST |
| Singer | XXX |
When digitizing your logo, you’ll need to export or request the correct format for your specific machine.
What Kind of Logos Work Best?
Not all logos are created equal when it comes to embroidery. Before you digitize, check these things:
1. Clarity
Your logo should be high-resolution. Blurry or pixelated images make digitizing more difficult.
2. Simplicity
Complicated designs with gradients, small text, or too many colors don’t translate well in thread. Simplify where possible.
3. Bold Lines & Contrast
Crisp edges and strong contrast make it easier for your machine to follow the digitized paths.
Tools to Digitize a Logo for Embroidery
If you want to digitize your logo yourself, you’ll need specialized software. Here are some popular options:
| Software | Best For | Price |
| Wilcom Hatch | Professionals | Paid |
| SewArt | Beginners | Affordable |
| Ink/Stitch | Open-source users | Free |
| Embrilliance | Mac-friendly users | Paid |
| Brother PE-Design | Brother machine owners | Paid |
Each tool lets you manually or automatically trace your logo and assign stitch types, colors, directions, and more.
Step-by-Step: Digitize Your Logo for Embroidery
Ready to get hands-on? Here’s a simplified walkthrough of the process.
Step 1: Import Your Logo
Open your embroidery digitizing software and upload your logo. Most programs support JPG, PNG, SVG, or BMP file formats.
Make sure:
- Background is removed (transparent preferred)
- Image is high-resolution (300 dpi or more)
Step 2: Outline the Design
Trace over the design elements using your software’s manual digitizing or auto-digitizing tools.
- Use satin stitches for outlines or text
- Fill stitches for solid shapes or backgrounds
- Running stitches for fine detail lines
Step 3: Assign Stitch Types
This is where the magic happens. You’ll define how each part of the logo will be stitched.
| Element | Recommended Stitch Type |
| Borders/Outlines | Satin |
| Filled Areas | Tatami or Fill Stitch |
| Small Text | Running or Satin |
| Thin Lines | Running Stitch |
Step 4: Adjust Stitch Direction & Density
- Stitch direction affects texture and strength.
- Stitch density controls thread coverage.
Too dense = thread bunching
Too light = gaps in stitching
Pro tip: Add underlay stitches to stabilize the design on fabric.
Step 5: Assign Thread Colors
Most embroidery software allows you to assign thread colors from popular brands like:
- Madeira
- Isacord
- Robison-Anton
Choose colors that match your logo, and remember to simplify where needed.
Step 6: Save in Machine Format
When you’re finished, export your file in the correct format:
- PES for Brother
- DST for Tajima
- JEF for Janome
Save a backup in your software’s native format too, in case you want to make changes later.
No Time for DIY? Use a Digitizing Service
Learning digitizing software takes time, and getting clean stitch results requires skill and practice. If you’re not ready to go down that road yet, it’s totally okay.
That’s where services like Digitizing Buddy shine. Just upload your logo and:
- Choose your machine format
- Get a perfectly digitized file (usually within 12 hours)
- Enjoy unlimited revisions and beginner-friendly support
It’s fast, affordable, and ideal for beginners or busy business owners.
FAQs About Logo Digitizing for Embroidery
Can I digitize a logo in Photoshop or Illustrator?
Nope. Those are great for creating vector artwork, but they can’t generate stitch files. You’ll need embroidery digitizing software.
Is auto-digitizing good enough?
Auto-digitizing tools are helpful, but often messy. Manual digitizing gives better control, cleaner stitching, and fewer thread breaks.
How much does digitizing cost?
Most digitizing services charge $10–$25 depending on complexity. Digitizing Buddy keeps pricing affordable and turnaround quick.
What if my logo has small text?
Small text can be tricky. You may need to simplify it or use only larger fonts. A good digitizer will help resize and clean it up for best stitch results.
Final Thoughts: From Logo to Stitch in a Few Simple Steps
Digitizing your logo for embroidery doesn’t have to be scary or expensive. With the right software—or better yet, a reliable service—you can turn any logo into a sharp, professional embroidery file ready for your machine.
If you’re just starting out or don’t want to mess with software, let the pros at Digitizing Buddy handle it. You’ll get:
- Clean, machine-ready files (PES, DST, JEF, and more)
- Free revisions
- Fast turnaround
- And best of all—flawless stitching results every time